If you want to be a successful blogger with a decent fan following, you must master the art of writing awesome content. While this sounds obvious, you should also learn how to grow your loyal audience base by building a list of subscribers gradually. Speaking of subscribers’ list, there are quite a few tools to help you with it. However, I highly recommend using MailChimp, particularly if you’re new to blogging.
In this guide, I will teach you how to,
- Create a MailChimp Account and List of Subscribers
- Install and Configure Your MailChimp Plugin
- Set up an RSS to MailChimp Campaign
Please, note that there are many ways to start an automated newsletter campaign with MailChimp. Once you follow the tips below and create your own email newsletter campaign, you should be in a pretty good situation to customize your email campaign as per your needs. However, if you’re a newbie, you should stick to these simple steps as of now.
Step #1: Create a MailChimp Account
Create an account with MailChimp. It’s free and all you need is an email. When I say FREE, it essentially means there’s a FREE Plan that allows you to send up to 12,000 emails to a list of 2,000 email subscribers per month.
At MailChimp, they call it Forever Free plan.
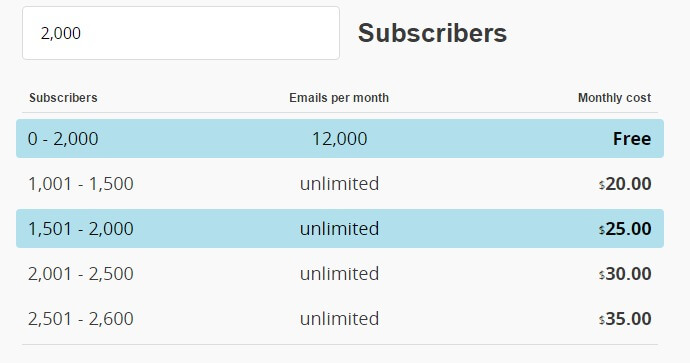
If you’re new to blogging, this is a great plan for you to check out. There’s simply nothing to lose by taking the world’s most trusted email marketing tool for a test drive.
Step #2: Create a MailChimp List of Subscribers
Assuming you have just started your blog and you really don’t have any subscribers, you still need to create a list of subscribers in order to integrate your list to your MailChimp plugin.
Creating a list is no big deal. All you need is to fill out some details and click save.
To get started, log into your MailChimp dashboard and click on Lists and then click on “Create List“. Fill out the list details. Save the details once you’re done.
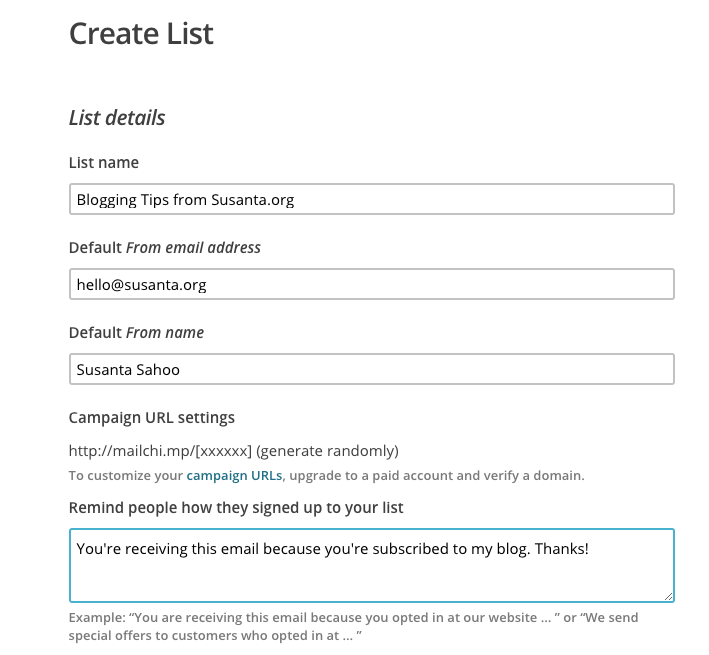
On the next page, you can add contacts (email addresses) by importing your existing subscribers or creating a sign up form. Check out the second option in the next step if you want to create a sign-up form.
Step #3: Install & Configure Your MailChimp Plugin
In order to build a loyal audience, you need to allow your blog visitors a chance to subscribe to your new posts. You can do so simply by creating an opt-in form on your blog. There are two ways to do it.
First Option: Install and Configure MailChimp Plugin
There are quite a few plugins available for this. However, I would recommend using MailChimp’s very own plugin because of the compatibility factor. If you want to use any other plugins, you could choose from one of these. My personal favorites include MailMunch Plugin and MailChimp for WordPress.
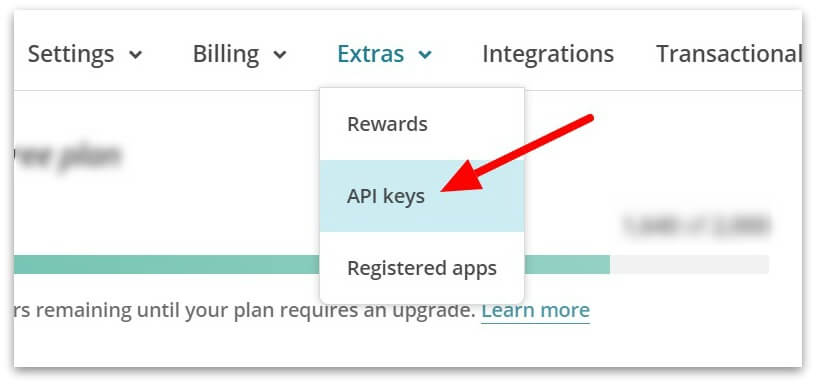
If you choose to go with MailChimp List Subscribe form, it should be pretty straightforward for you. Once you install and activate the plugin, you will need to enter your API Key. You can generate API Key by following this path: Account under your name > Extras > API Keys.
Then go to your plugin dashboard and enter the key and click connect. (Screenshot below)
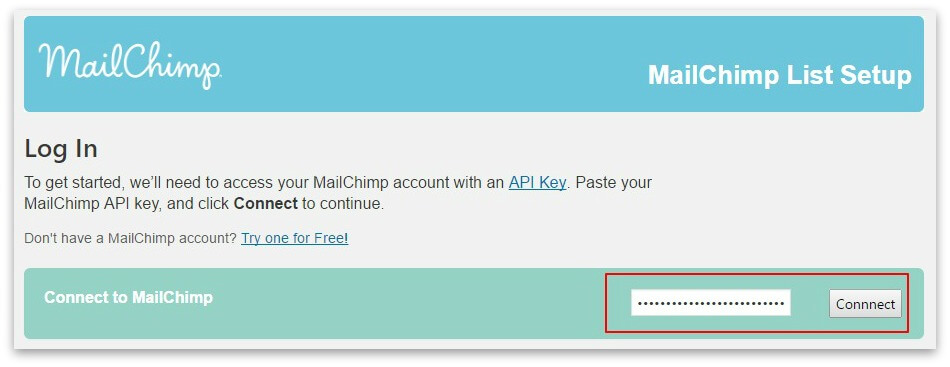
Done! You should now be able to add an opt-in on your sidebar widget area.
Second Option: Create Sign Up Forms Using Embedded Forms
If you want to choose any third-party plugin or simply insert the code inside a text widget, you can choose this option. In most cases, you will require just a Form Action code for your plugin to work. However, if you want to use a text widget, then you can generate the code snippet inside MailChimp and then enter it in your text widget box.
First, you need to download and install one of the third-party opt-in plugins of your choice. However, none of those plugins will work on their own. You still need to generate a Form Action.
In order to get the Form Action code, simply click on the Embedded forms option, and then choose only the form action code from the available code snippet (as shown in the screenshot below).
It doesn’t matter if you choose Classic, Super Slim, Horizontal or Naked, your Form Action code will remain the same.
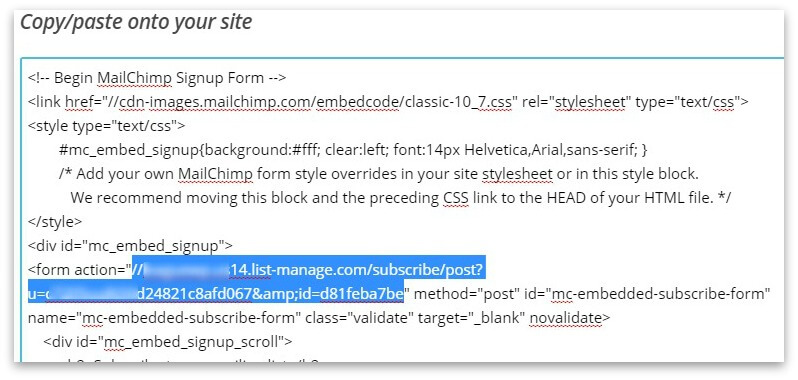
Once you copy the Form Action code, go to the widgets area and enter it at the appropriate place within your plugin. Fill out any other details, save it and you’re good to go.
Alternatively, if you go the text widget way, you can simply copy the entire code snippet and paste it into a widget box. In that case, you don’t need to install any additional plugin.
Step #4: Create a New RSS Campaign
After creating your profile, log into your dashboard, go to campaign tab, and click on Create Campaign located at the right-hand upper corner.
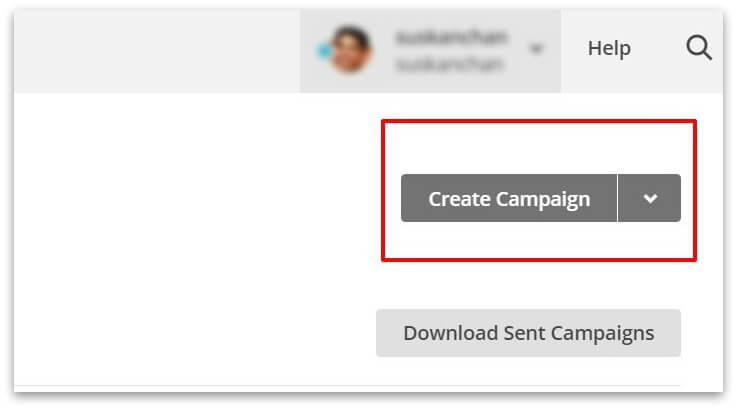
Step #5: Choose Your Campaign Type
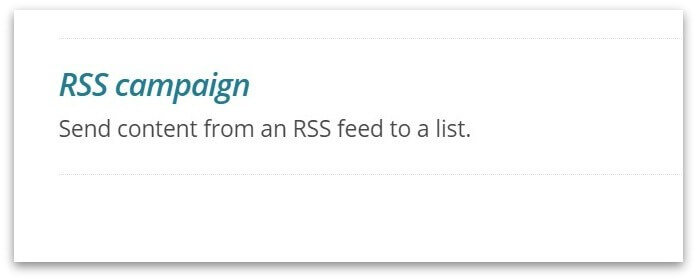
You need to select a type of campaign from the available options. Choose RSS Campaign and click on the select button.
Why RSS Campaign? Because we’re going to integrate our blog’s RSS feed.
Step #6: Add Your Blog’s RSS Feed
Enter your blog’s RSS Feed URL. If you have a self-hosted WordPress blog, then you simply add/feed at the end of your blog URL and you should see the xml feed.
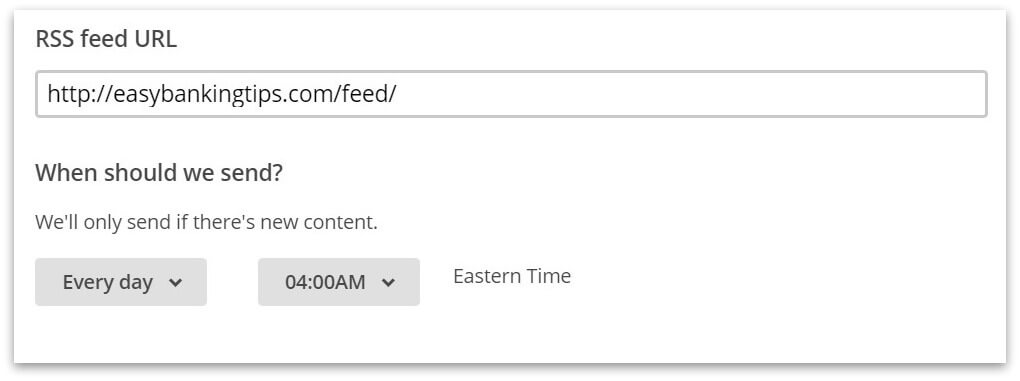
For example, for this blog, it’s https://susanta.org/feed.
So, you need to enter your feed URL and specify time and day – MailChimp will help your blog to automatically send the latest posts to your blog subscribers based on the time and day specified.
MailChimp typically shows the US time zones. If you live in any other time zone though, you need to simply convert the time to your zone simply by searching on Google.
For example, if you enter 4AM EST to IST on Google, you will get the following results: 1:30 PM Wednesday, Indian Standard Time (IST).
This helps you understand when MailChimp will send newsletters to your subscribers.
Sounds confusing? Leave your questions in the comment below and I can explain it further.
If you get this, let’s move on to the next step.
One more thing: There’s an option to resize your RSS feed images. Simply check the box.
NOTE: The next button is located at the bottom of the page just in case you’re unable to see it properly.
Step #7: Set Up Your Campaign
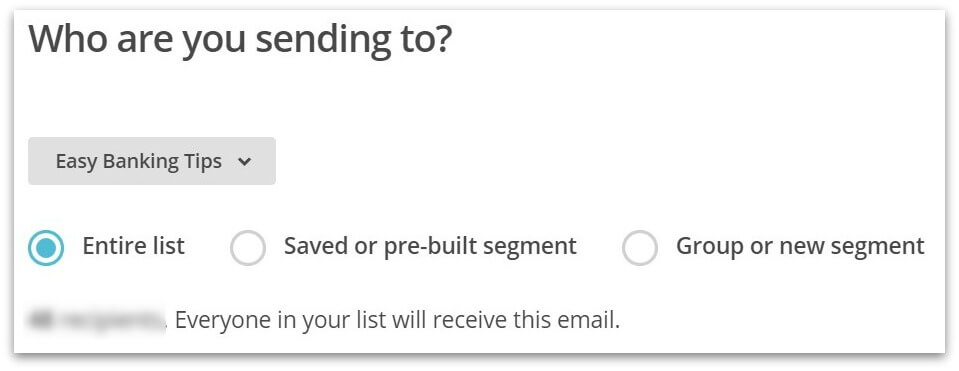
Set up your campaign. Just fill in a few details about your campaign and click next.
Step #8: Choose MailChimp Template
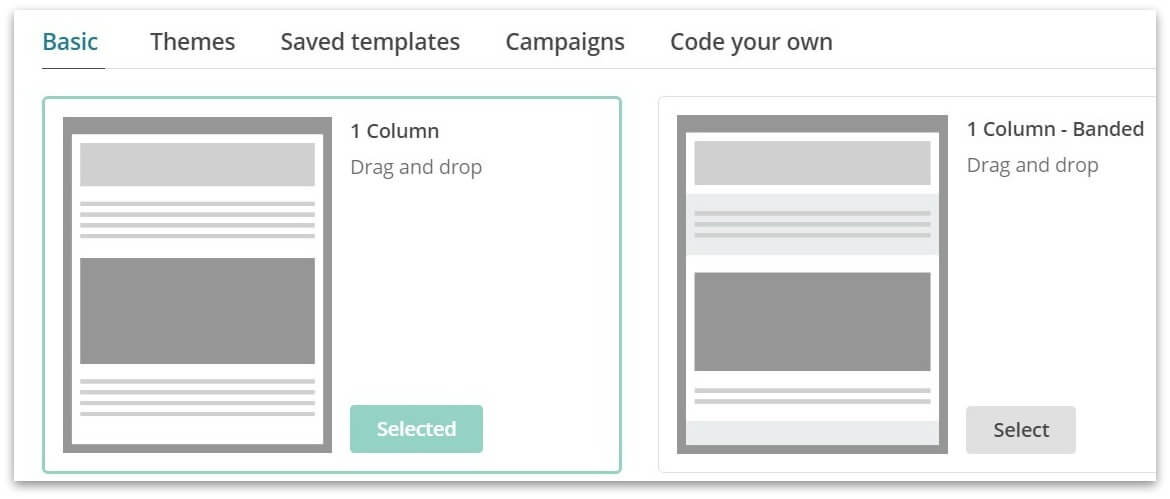
Here, you need to choose an email template. You can go with the first template (Column 1) because you want to get the hang of it.
Step #9: Design the MailChimp Template
Once you have chosen the template, it’s time to design it. A MailChimp template essentially consists of different blocks filled with code designed with RSS tags.
Since it’s automated RSS-to-Email campaign, you need to configure different elements of your template.
For example, you might want to choose to show only the tile of your most recent post, a description and a few posts published earlier.
To begin with, click on any element of your chosen template and you can see the edit/delete button. When you click on the edit button, you will see the RSS items on the right-hand side of the panel.
On the menubar, click on the source button to edit the RSS code. For your convenience, I’ve created a ready-made code snippet that you can use to replace the existing RSS code.
If you want to make any changes in the code above, this guide can help you.
Click on each of the existing blocks and make edits as per your preference. On the top menu, you can click on “Preview and Test” to see what the current template looks like.
Once you’re done with the template, click on Next button to proceed to the next and final step.
Bonus Tip: If you want to show your featured image in the RSS Feed, install and activate this plugin. Because of some weird MailChimp-WordPress compatibility issues, your featured image doesn’t automatically appear on your RSS feed. However, this plugin solves this problem.
Step #10: Review Your Campaign and Activate It
At this point, your campaign is ready to be sent to your email list. MailChimp shows you a list of items for review so you can fix if there’s something is amiss. You should see a green tick against all items if you have done everything right so far. Click on the Start RSS button (Confirm RSS Start) and it’s done and done!
The next time you publish any post on your blog, it will be sent to all the email recipients in your subscribers’ list.
Hope you find this tutorial useful. If you have any questions. Please, leave it in the comments below.
