What is a self-hosted WordPress blog and what should you care about?
If you are reading this post, you probably already know what a blog is. Also, I’m assuming you already know about free blogging sites such as WordPress.com, Tumblr.com, and Blogger.com.
A free blog is fine if you don’t write very occasionally and don’t want to worry about paying for a domain name, web hosting service, or hiring a website developer. However, if you are someone who shares a lot of stuff to share with the people on the Internet, you can really take advantage of launching a self-hosted WordPress blog. Here are some quick benefits:
#1: You have great control over the look and feel of the blog
#2: You can monetize your content the way you like it
#3: You gain authority and build your own brand
Although you could use any blogging software to launch your blog, I recommend WordPress because it’s what experienced bloggers have switched to after trying out other blogging software platforms. But if you’re still not convinced, here are some compelling reasons to try WordPress blogging software.
Okay, now that you really want to get started with a self-hosted WordPress blog, you need to know some basic stuff and I assume you probably don’t know it yet. This is why I’m writing this post in the first place.
If you want to set up a self-hosted WordPress blog, chance are:
- You want to set up a brand-new WordPress blog from the scratch
- You want to move a WordPress.com blog to a Self-hosted WordPress blog
In this guide, I’m going to help you set up your self-hosted WordPress blog along the way, no matter which of above two scenarios you’re in. Since this is a lengthy post, please click on the links below if you want to skip to a specific section.
- How to Buy a Domain Name for Your WordPress Blog
- How to Buy a Hosting Service Your Self-hosted WordPress Blog
- How to Install WordPress Blogging Software on Your Hosting Panel
- How to Move Your WordPress.com Blog to Self-hosted WordPress Blog
First off, some basic things about what it all involves to build a self-hosted WordPress blog.
You will need the following things:
#1: A Domain Name (That’s Name for Your Blog/Website)
Domain Names are purchased from a Domain Registrar. There are many domain registrars selling domain names in India, such as BigRock and Godaddy. I think it’s a good idea to go ahead with Godaddy. (https://in.godaddy.com/)
Before you buy a domain, you should decide on the name. Also, decide if you want to go for a .com, .in, .net, .org etc. Depending on the domain extensions (TLDs), the prices will vary.
How much it cost to buy a domain?
If you buy a .com domain name, then it should cost you around Rs. 500 for the first year and then around Rs.900 per year subsequently. (You will need to renew it every year)
If you buy a domain name with any other extension (such as .in or .net), then it will cost you Rs. 99 for the first year and then Rs. 500 per year subsequently.
As you can see .com domains are considered best and are often the first choice among ambitious blog owners.
Good domain names are usually already taken so before you visit GoDaddy, it’s highly recommended that you think about unique domain names.
For example, most likely, you may not find yourname.com or yourhobbies.com available anymore. Similarly, brandable names such as mytravelblog.com or yourtravelblog.com are unlikely to be available with any registrar either.
If you want to give your blog a unique name (provided it is short enough for brand recall), it’s highly recommended that you should think about it properly. Have a list of ten domain alternative domain names if one of your choices is not available.
Sometimes, if a domain name is not available in its .com, the same may be available with any other domain name extensions. You may want to check the same on Godaddy.
IMPORTANT: Some domains are called premium domains and are sold at high prices (Rs. 50,000). Why so high? Those domain names are usually bought already and sold at higher prices. You might want to just ignore them.
How do you buy a domain on Godaddy?
Using net banking, debit card, credit card, etc. It’s totally safe and there’s nothing to worry about.
#2: Hosting Your Domain Name
Once the domain name is purchased, it’s time to host it. Think of your domain name as the name of your shop but you would need someplace in the town to start a shop/store. Buying hosting is buying space for your website. It’s like space on your smartphone or laptop, the higher, the better.
How much it would cost to buy a hosting service?
Depends on how much traffic you are planning to drive to your blog down the road. For example, Godaddy has a plan that starts with Rs 99 per month (nearly Rs. 1200 per year).
It is able to support a WordPress that gets up to 25,000 visitors.
What will happen if you get, let’s say, 40,000 visitors?
Your blog will crash, meaning it will go down or invisible to your visitors.
Just for some knowledge, here are some more plans from Godaddy: https://in.godaddy.com/hosting/wordpress-hosting
As you see buying a domain name and hosting from Godaddy can set you back Rs Rs. 1500 to Rs. 2000 per year. That’s nearly Rs. 150 per month. It’s more (in terms of higher hosting cost) when you drive more traffic to your site.
#3: Installing WordPress Blogging Software
Once you buy the domain and are done with hosting it, it’s time to install the WordPress blogging software. Here’s what it involves: You will need to choose from a list of free WordPress Themes for blogging site. Think of a WordPress theme as walls, roof, and floors, windows of your shop.
Then simply install the theme and configure it.
Aside from the Theme, you will need install some plugins (they are like apps for your smartphones). They add functionality to your blog and help it look/perform better when people visit it.
Once the theme is installed/configured and plugins are installed/configured, you’re self-hosted WordPress blog is ready to go live.
IMPORTANT: I recommend some posts ready before the website goes live. You might want to use the existing content on your free WordPress/Blogger blog as well.
Transfer WordPress.com Site to New Domain
Step #1: Purchasing web hosting (already discussed above)
Step #2: Installing WordPress (already discussed above)
Before You Move WordPress.com to Self-hosted Domain: Complete The Following Steps
Step #1: Export Content from WordPress.com Blog to Self-hosted Blog


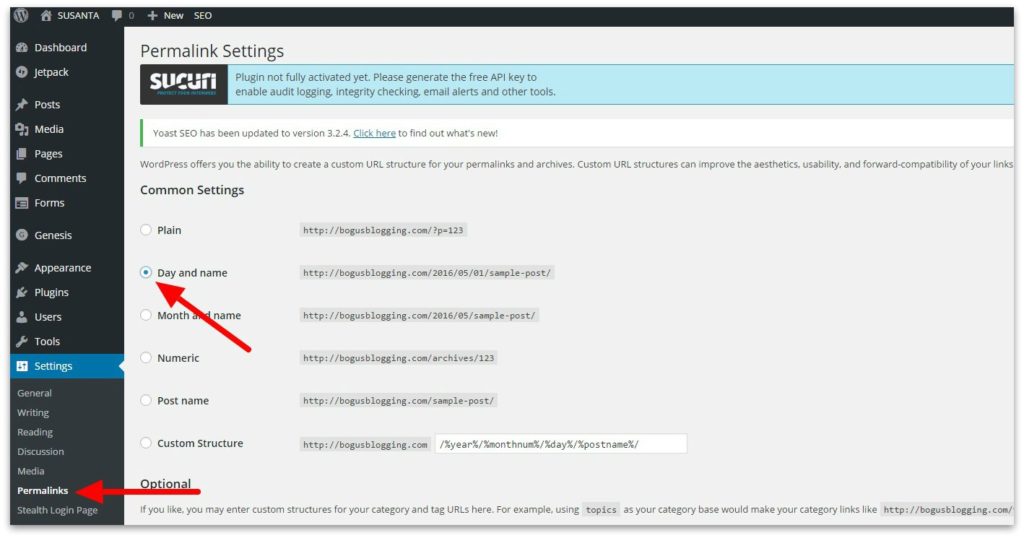
Step #2: Set Permalink Structure
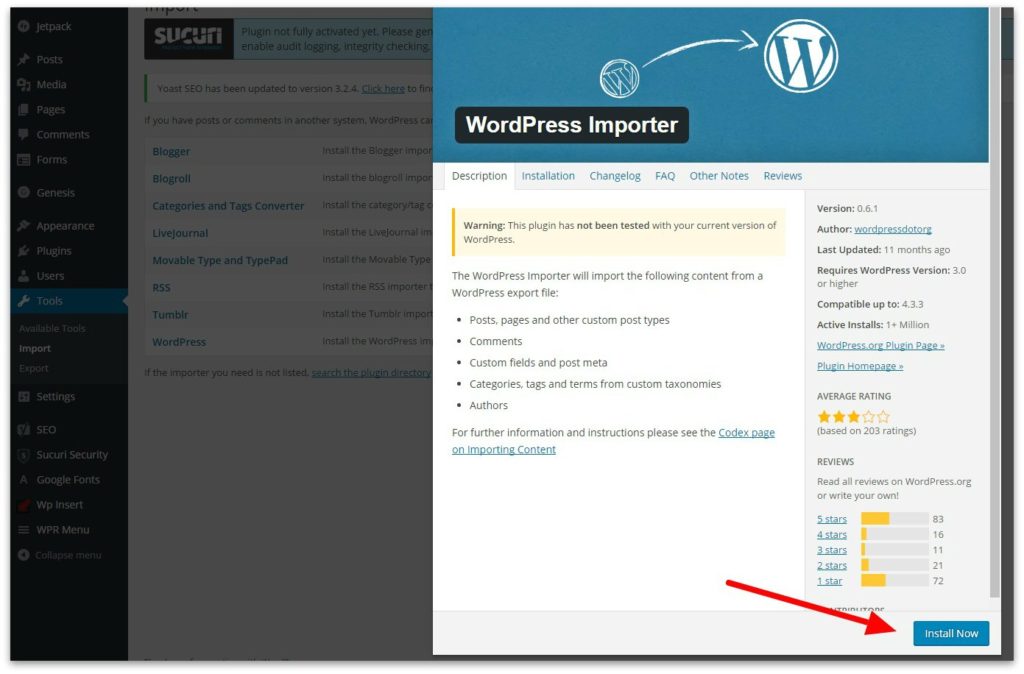
Step #3: Install WordPress Importer Plugin
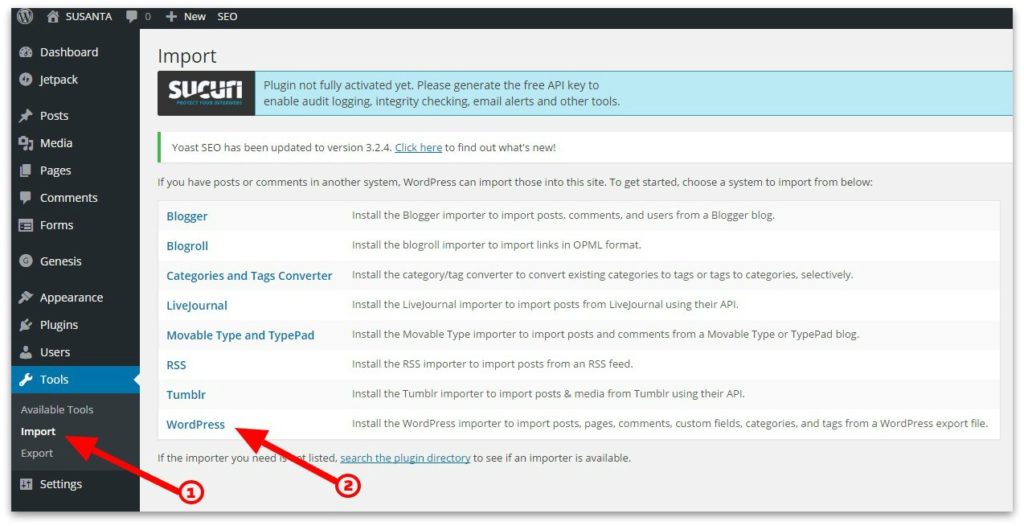
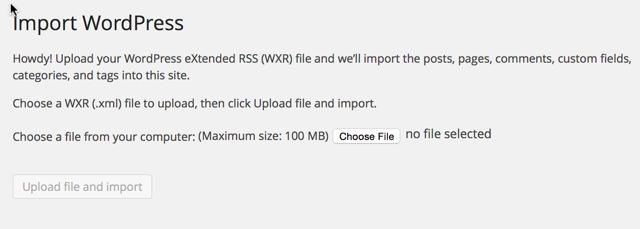
Step #4: Import Content (XML File) to Self-hosted Blog
Step #5: Redirect Your WordPress.com Blog Address to Self-hosted Blog Address
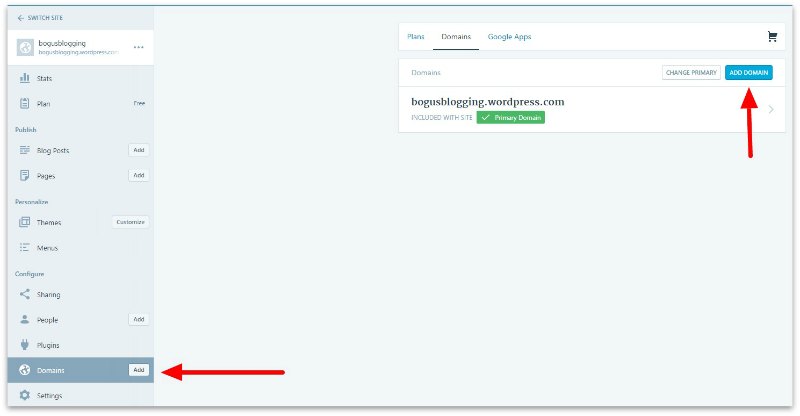
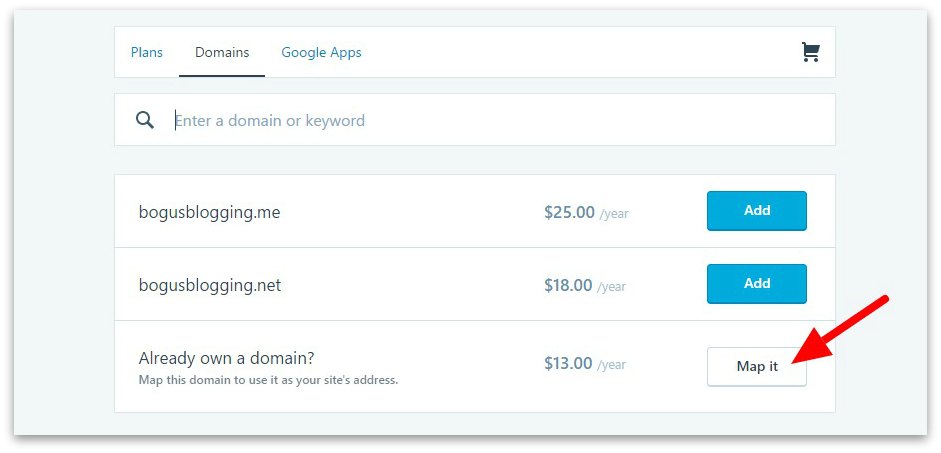
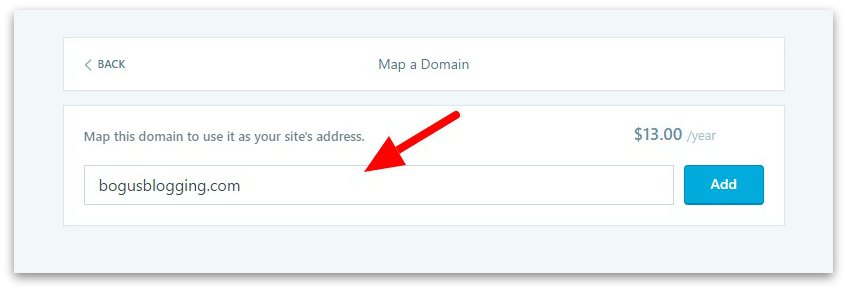
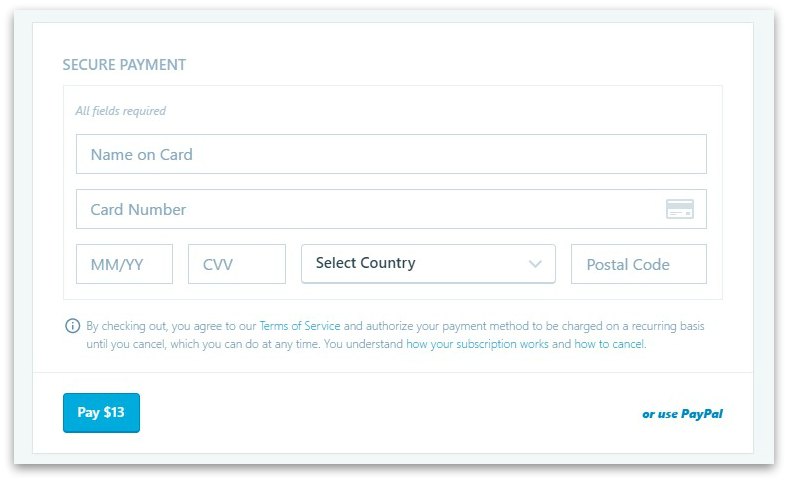
Domain Mapping is a paid service by WordPress.com. Presently, you need to pay $13 per year to use this service. I recommend using this service ONLY IF your WordPress.com blog has a lot of posts/pages and subscribers. If you don’t use this service, all the search engine traffic to your WordPress.com blog will not be redirected to your self-hosted WordPress blog. Therefore, you need to make a decision based on the traffic/subscribers stats of your WordPress.com blog.
If you’re ready to pay for the Domain Mapping service, log in to your WordPress.com blog
Step #6: Migrate Your Existing Subscribers to New Self-hosted Blog
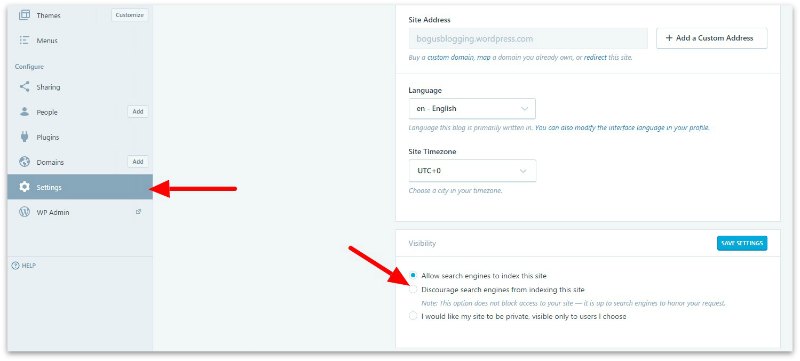
Since all your old posts/pages/images have now been moved to your brand-new self-hosted WordPress blog, you need to ask Google and other search engines to stop indexing them.
Step #7: Discourage Search Engines from Indexing Your WordPress.com Blog
Hope this helps. If you have any questions, please, ask me in the comment section below.
What’s Next? Read the following WordPress guides to learn how to tweak your self-hosted WordPress blog for safety and performance.
Additional Reading Recommended: