Are you planning a bike trip and looking for ways to display live tracking of your trip on your website? Thanks to SpotWalla, you can do it using your mobile phone as a GPS device. All you need is an GPS app such as Bubble GPS app.
In this post, I’ll walk you through the steps required to display live tracking of your trip on your website.
Let’s go:
Contents:
- Sign up with SpotWalla
- Download Bubbler GPS Mobile App
- Configure Your SpotWalla Profile
- Configure Bubbler GPS App
- Create a Trip
- Embed Map on Your Website
- Go on a Test Ride
Sign up with SpotWalla
Visit SpotWalla.com and Sign up.
Download Bubbler GPS Mobile App
Download the Bubbler GPS App from Google Play Store. You will find two different versions — basic version (free) and advanced version (premium). Download the basic version if you were trying to test the app.
Enter your SpotWalla credentials to login.
Configure Your SpotWalla Profile
Login to SpotWalla website to configure your SpotWalla account.
On the top right corner, click on your username. From the drop-down menu, click on devices.
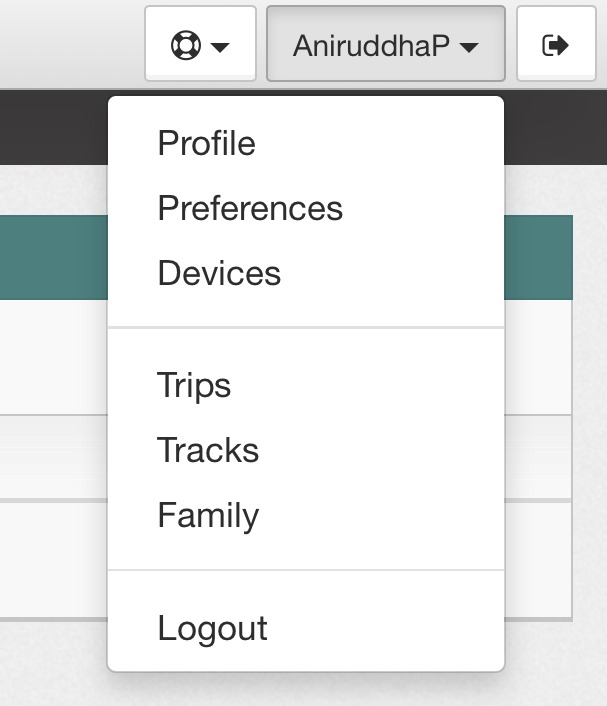
You should see My Devices page now.
Under description, you should see your device (i.e mobile device) now.
Click on your device name (e.g Redmi Note 4) to see a drop-down menu.
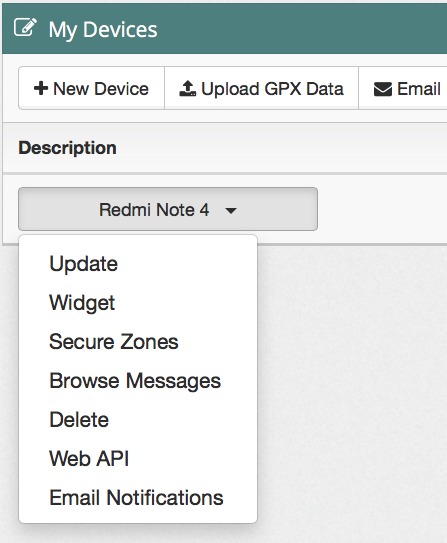
Click on Web API on the drop-down menu.
On the Web API page, you will see “Enable/Disable API” option. If it’s disabled, click on Enable button to enable your API. Basically, you’re enable your GPS device to send data to your SpotWalla account.
Once done, click on the “Devices” button the bottom right corner to return to your My Devices page.
On My Devices page, click on your device name and then click on “Widget”.
Look at the screenshot given below and make sure you follow the same configuration as shown in the screenshot.
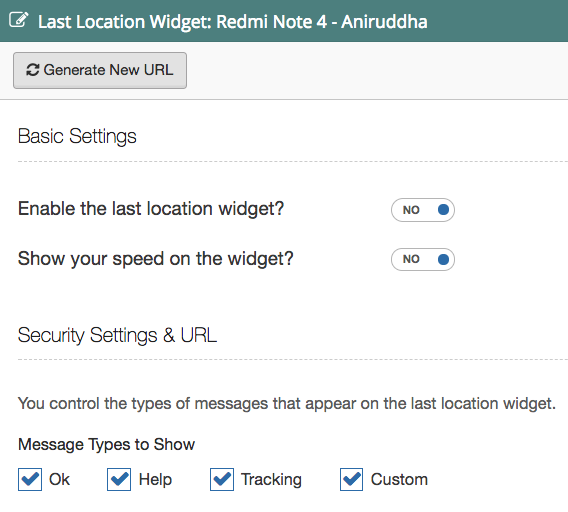
Once done, click on the “Update” button.
Configure Bubbler GPS App
On your GPS Device (i.e mobile phone), you need to configure the settings to connect it to your SpotWalla account.
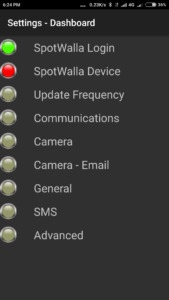
Click on the settings to see a menu. Click on the SpotWalla Device option to whether it detects your device or not.
If you have enabled your device in SpotWalla as shown earlier, you should see your device under “Device Currently Selected”.
Create a Trip
In order for SpotWalla to track your movement and show GPS data, you need to create a trip first.
To create a trip, head over to SpotWalla website and click on the “trips” on the drop-down menu under your username.
Click on the New button to create a new trip and configure it as per the following criteria.
Choose Your Device: If you have enabled only one phone, it will display your device on default. If you have multiple devices enabled, then choose the device you want to carry for your trip.
Trip Name: Give your Trip a name. That’s up to you.
Trip Description: Give a description. Again, that’s up to you.
Start Date/Start Time: Suppose you want to start your trip today, set the date from the calendar. Choose the current time as per your location.
End Date/End Time: I’d advise choose a future data, i.e last date of the current month. Choose any time of the day to set the end time.
Security Options: You need to make sure you set the security options to allow SpotWalla to track your GPS data and display it on your embedded map which is available for public view.
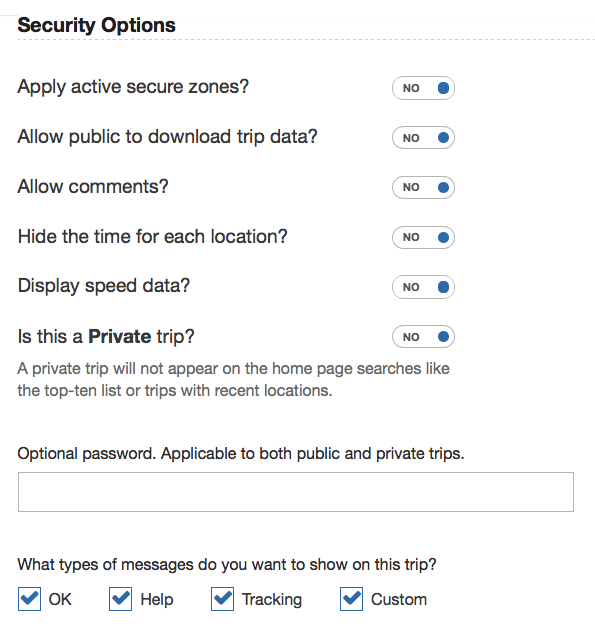
Leave everything as is if you’re creating the trip for a test ride.
Note: There’s an option that allows you to “Draw a line from one location to the next”. Make sure it’s enabled so you see lines on your map.
Now, click on the “Create” button to create the map.
Embed Map on Your Website
If you want to embed your map on website to let your website visitors track your trip live, you need to copy the appropriate code and paste it inside a widget (preferably, home page widget) on your website.
Go to Trips in the drop-down menu under your username, click on the “Trip Links” under your trip name (the one you just created), and copy the link under “Embedding”.
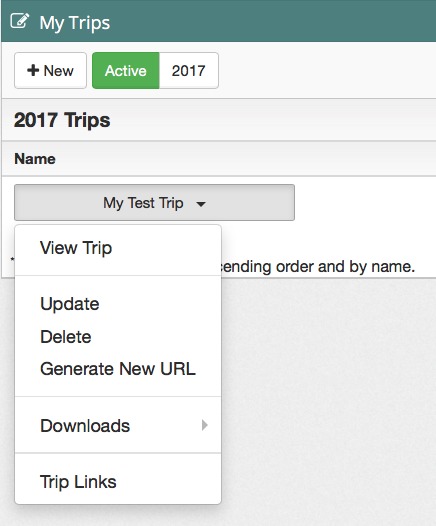
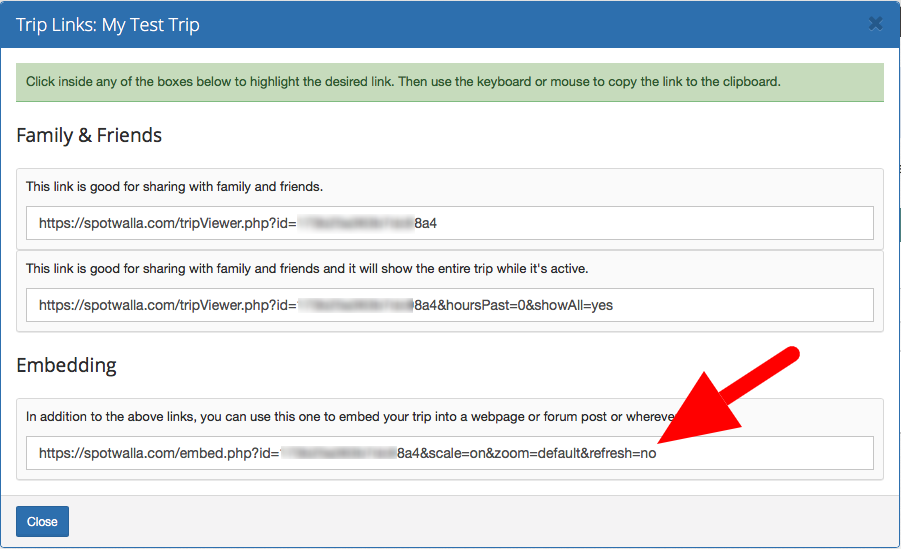
Alternatively, you can simply copy the code below, replace the default ID with your ID and insert inside the widget on your website.
Go on a Test Ride
This is the last step. SpotWalla requires that you move at least 100 meters distance in order to help it track and display GPS data.
However, you can move a little farther to generate more GPS data if you want.
Here are a couple of things to keep in mind while testing:
- Carry your GPS device with you while traveling for test.
- Make sure the GPS device is connected to the Internet.
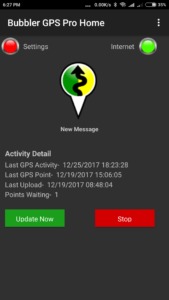
- Make sure your click on the update button on your Bubbler GPS app home page at some intervals. While the GPS app is supposed to send data to SpotWalla automatically, I couldn’t confirm if it was working that way. However, if you click on the update button, it will send the data to SpotWalla map.
- Don’t click on the “End Trip” button unless you’re done testing.
The SpotWalla embedded map is updated every fifteen minutes or so. So expect to see your tracks only after some time.
That’s it. I hope this guide helps you set up your live tracking widget on your website. If you have any questions, please, let me know.
NOTE: If you want advanced features, you can buy the premium version of Bubbler GPS app. You can email both SpotWalla and Bubbler teams and expect to get a quick reply. Also, if you’re feeling generous, be sure to donate to SpotWalla.

