Most folks use Gmail as their default email address. And, that’s fine!
But what if you’re running a business? Would you still use a basic Gmail address for your brand?
Well, that ain’t so smart of you!
Did you know you could set up a custom email address with your domain name for free?
Yes, it’s free meaning you don’t have to spend a dime and it takes only fifteen minutes to set up.
If you’re interested, you should head over to my guide: How to Get a Custom Email Address for FREE.
But this post isn’t about just owning a free email address for your website. It’s about setting it up as a Gmail address — pretty much like how you would use your free Gmail address for personal use.
That’s cool, right?
Here’s Why Linking Your Custom Email Address to Gmail is a Smart Idea
Free Space: When linked to Gmail, your custom email address gets as much as 15 GB storage space, meaning you needn’t worry about running out of space anytime soon.
Search Feature: If you use Gmail, you know the Search Features are probably the coolest of all. It’s such a time-saver! Imagine searching for past emails from your customers or vendors. I know it’s a breeze. That’s exactly why you should custom email in Gmail.
Better Spam Filter: If you’ve been using emails extensively, you know spam is such a pain in the rear side. However, Google has probably one of the best spam filter technology so you needn’t lose your sleep over dealing spam emails. Yes, one more compelling reason why you should use Gmail as your custom email address.
Okay, I Get it. How Do I Setup FREE Custom Email With Gmail?
You’ll need just an existing Gmail ID or create a new Gmail address to set up your custom email address with.
That’s your call.
Once you decide that part, the rest of it is pretty simple.
Step #1: Log on to your Gmail account.
Step #2: Click on the Cog Icon at the top right and choose “Settings” from the drop-down.
Step #3: In the Settings, you can find “Accounts and Import” in the top menu.
Step #4: The “Send mail as” is what you’re going to configure in order to set up your custom email account with Gmail.
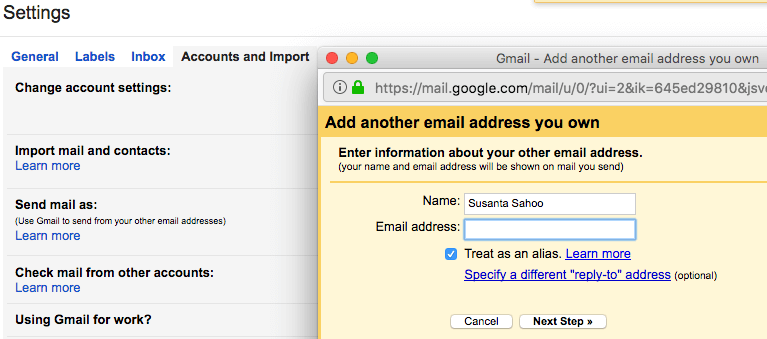
Step #5: Click on “Add another email address” and a window will pop up. It’s time to configure it.

Step #6: Enter your custom email address in the pop-up windows. Leave the name as is. Checkbox for “Treat as an alias” should already be checked. If not, make sure you to select it.
Step #7: When you click on “Next Step“, it will ask you to enter the following information:
SMTP Server: Referring to my earlier guide which features Zoho Mail, I’ll use the SMTP Server of Zoho Mail. You can use the SMPT Server of your email host.
Port: You needn’t really do anything here; Gmail automatically choose the port based on your host.
Username: Enter your custom email address.
Password: Enter your password for the custom email address.
Step #8: Before you click on “Add Account”, make sure the SSL (Recommended) is ticked. Now, click on “Add Account” and proceed further.
Step #9: Gmail will send you a verification link/code to your custom email address. Check your inbox to click on the verification link or enter the code manually and click on verify.
Congratulations! You’ve successfully set up your custom email address in Gmail.
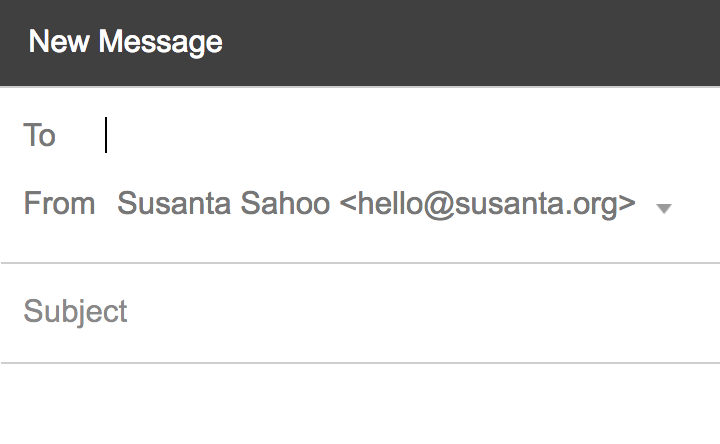
Step #10: As an optional step, if you want Gmail to use your custom email address as the default, you need to click on the “make default” link. This essentially means when you create and send a new email, Gmail will use your custom email address in the “From” section.

That’s it! Now enjoy the Gmail features 🙂
I hope this guide helps you set up your custom email address on Gmail.
As a favor, you could share this guide with your friends on social media and spread the word around.
Let me know if you have any questions — share your thoughts in the comments below.
