Google AMP or Google Accelerated Mobile Pages is a project by Google to encourage web publishers to make their website AMP-compliant in order to help users with a slow Internet connection access their pages easily.
Google AMP vs Facebook Instant Articles
While Google AMP is focused on helping Google Search users, Facebook Instant Articles aims at helping Facebook Mobile App users access content quickly.
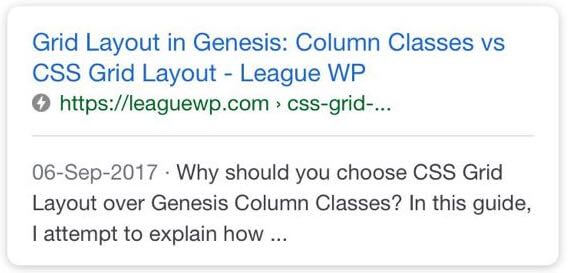
When you perform a Google Search and see an AMP Icon prefixed on a Search Result, it’s an indication that the website is AMP-Compliant.
When you click on that result, you will see the stripped-down AMP-version of the result. Typically, the page will have a logo, a navigation, and the content.
Most importantly, it will prominently display a “close button” above your article, which when closed will take you back to the Google Search Result Page.
This is something a lot of web publishers are not very happy about but let’s delve deeper into that later in this post.
Facebook Instant Articles are different from Google AMP in that the Facebook project is designed only for Facebook publishers to optimize their Facebook content. It’s important to note, Facebook Instant Articles are only visible on mobile apps, not desktop or mobile browsers.
Is Facebook Instant Articles project worth your efforts? This is beyond the scope of this article. So, I’ll save that for another post.
Both Google AMP and Facebook Instant Articles are designed to make your content load faster, improving the user experience.
Steps to Implement Google AMP on Your WordPress Site
Step #1: Install AMP by Automatic plugin
This plugin adds support for Google AMP to your WordPress site. Simply install and activate this plugin.
Activating the plugin adds an AMP customizer panel to your WordPress backend.
To see the panel head over to Appearance > AMP where you can customize the design of your AMP-compliant pages. Click on “AMP” and then click on “Design” to see options for changing Header Text Color and Header Background & Link Color. You can also switch between light and dark color scheme.

Once done, don’t forget to save your changes by clicking on the “Publish” button at the top of the AMP customizer panel.
Step #2: Test Your Google AMP Compliance
Upon activating the AMP plugin, your WordPress site immediately becomes AMP Compliant.
Although the AMP Customizer panel already shows you the AMP-compliant version of your website, you can still check the same on your browser.
To see what an AMP-version post looks like, follow the steps below:
- Visit any post on your blog
- Click on the post URL on your browser
- Add /amp at the end of your URL and hit enter. For example, http://example.com/my-blog-post/amp/
You should now see the AMP-version of your post.
Step #3: Save Permalinks (Optional Step)
As an additional step, you can head over to Settings > Permalinks and simply click on “Save Changes”. Please, note that this step is optional. Some users complain that they don’t see AMP version of their posts even after activating the plugin. Saving the permalink structure should work as a fix. However, for many others, this step is not required.
Viewing AMP-Compliant Pages on Google Console
As usual, Google doesn’t immediately crawl and index your AMP-compliant version. Depending on the crawl frequency of your site, Google might take a week to properly crawl and index your AMP-compliant posts on Google Search Results. You can also view them on your Google Console.
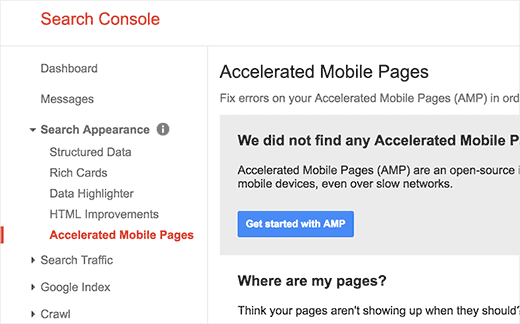
Here, Google will keep you updated on any potential errors found in your AMP-compliant posts.
If You Want to Add More Features to Your AMP-Compliant WordPress Site
The AMP by Automatic plugin is designed to make your website compliant with Google AMP. However, the default AMP-version strips your site off many of its features which may have added to help your website visitors.
That’s the whole point of the Google AMP project — to show a stripped-down version of your post so the content loads as quickly as it is possible on a mobile device using a slow Internet connection.
However, it doesn’t entirely serve your interest as a publisher.
- You want to retain some of the features (such as Social Media Buttons) so the users are able to share content on social media.
- Similarly, you want to be able to display ads (such as Google AdSense) to monetize your website.
Fortunately, there are many plugins to help you with this.
In this regard, the most popular plugin is Glue for Yoast SEO & AMP. However, for this plugin to work, you need to have already installed the Yoast SEO plugin on your WordPress Site.
Moreover, the main purpose of this plugin is to make sure the default AMP by Automatic plugin uses the proper Yoast SEO Metadata. So, if you’re already using both the SEO Yoast plugin as well as the AMP by Automatic plugin, it doesn’t hurt to install Glue for Yoast SEO & AMP plugin.
How to Use Glue for Yoast SEO & AMP Plugin
Step #1: Install and Activate the plugin.
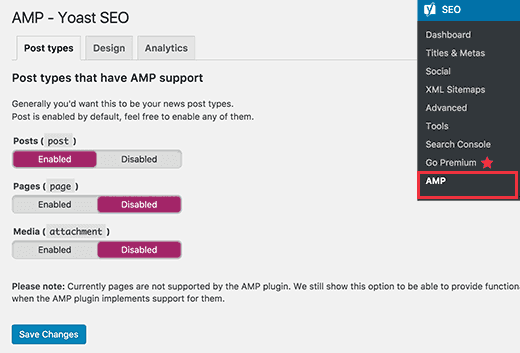
Step #2: Head over to SEO > AMP to configure the plugin. Here, you can see that the plugin allows you to enable AMP support for other post types pages and media attachments. However, they are disabled by default. Enable them if you want to add AMP support to your pages/media attachments. Or, leave them as is.
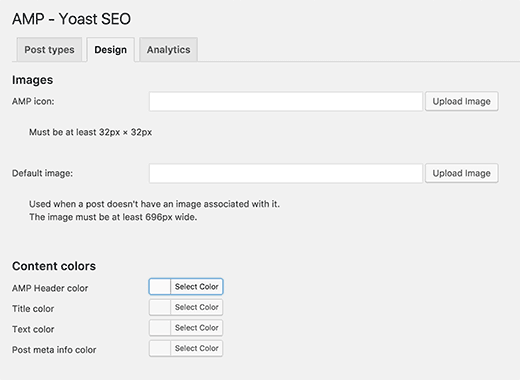
Step #3: Click on the Design Tab. You can see that plugin offers you the options to use an AMP Icon and a Default Image. This essentially means your visitors will see the logo of your website on your AMP-version post/pages. Similarly, they can also see a default featured image when a post doesn’t have one in it. The tab also lets you customize the color of your header, title, text and post meta info. Change them as per your needs.
Step #4: The third tab allows you to add your Google Analytics ID, meaning you can keep track of the performance of your AMP-compliant posts/pages.
Once you’re done, don’t forget to click on “Save Changes” to store your customizations.
Adding More Features to Your Google AMP WordPress Site
If you want to add more features such as Related Posts, Footer Widgets, and Social Media Icons to your AMP-compliant site, you need to search for the appropriate plugins and install them on your site. Again, covering those is beyond the scope of this post. However, I’ll write a separate guide on that soon.
Should You Make Your WordPress Site Google AMP Compliant?
I think you may have read quite a bit on the benefits of making your website Google AMP compliant.
The strongest logic of all is that it makes your site SEO-friendly and that it gives a ranking boost to your site.
While that may not be entirely true, there’s something you should definitely know before jumping on the Google AMP bandwagon.
There are many SEOs that have shared their disappointments over how Google steals your mobile traffic and makes it difficult for you to revert your actions when you decide to remove AMP from your WordPress site.
I’d encourage you to read the following two articles in particular.
An Alternative to Google AMP for WordPress
The prime objective of the Google AMP project is to help your site load faster on a slow Internet connection. More importantly, the website should be responsive, to begin with.
Assuming your website already uses a responsive design, the only thing you need to take care of is optimize your responsive version for faster loading on slower internet connection.
To make your website load faster, consider the following best practices.
- Use a Clean WordPress Theme (I recommend Genesis Framework)
- Use a Decent WordPress Host (I recommend Webfaction)
- Minify Your CSS
- Optimize Your Images
- Optimize Your Code
Read this detailed guide on how to make your WordPress site load faster.
Want to Activate Google AMP? Consider This!
If your WordPress site gets a lot of visits from mobile users, but it’s neither responsive nor fast enough to load on slow internet connections, Google AMP is a wise choice for you.
However, if you think you’re a WordPress Superhero who knows their game well enough, consider the alternative to Google AMP if you can afford it.
Should you decide to install the Google AMP Plugin, be sure to keep in mind of the following points:
- Have a header that points back to your main site
- Make sure your menu is visible in your AMP version
- Put a link of the post above the post, offering your visitors a chance to visit your non-AMP version
- Integrate your ads into your AMP version
- Make sure your Analytics code is properly installed
That’s it. If you have any questions or opinion about this guide, be sure to leave a comment below. Also, share this post on social media to let you know friends know about it.